Calligraphy Guidelines: How to Rule Your Own Practice Lines
What the baseline, waistline, ascender, descender and slant lines mean, how to pick an x-height for your pen, and how to rule a reusable master sheet with a pencil and ruler.
Practice at a glance
What you need
- Sharp pencil
- Ruler marked in millimeters
- Plain paper
- Protractor or a folded paper angle
- Fine black pen
- Paper clips
Letters need something to stand on. Calligraphy guidelines are the faint ruled lines that tell you where a letter sits, how tall its body is, how far its loops reach and how much it leans. Without them, size and slant drift from one word to the next, and it becomes hard to tell whether a shaky letter is a pen problem or a layout problem.
You do not need to buy ruled sheets. A pencil, a ruler and about fifteen minutes give you a set of lines sized for your own pen, and you can reuse it for months.
The five lines and what they do
A set of guidelines has four horizontal lines and a family of diagonal ones.
- Baseline: the line every letter sits on.
- Waistline: the top of the small letters such as a, n and o. The distance between the baseline and the waistline is the x-height.
- Ascender line: the top of tall letters such as b, h and l. Many beginners set capitals to this line too.
- Descender line: the lowest point of the tails on g, j, p and y.
- Slant lines: parallel diagonals that cross the horizontal lines and show the lean your downstrokes should follow.
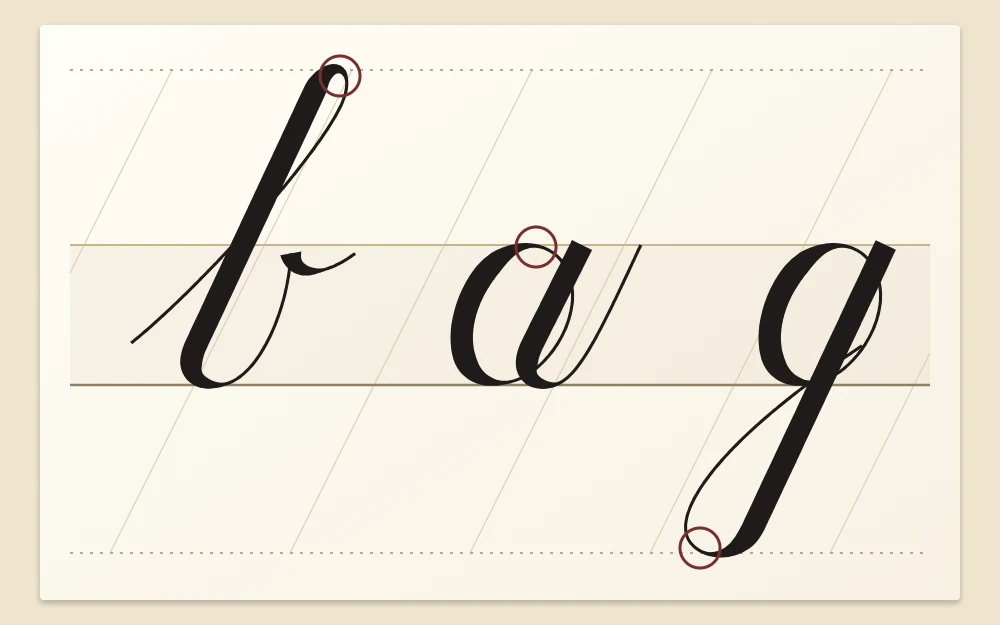
Once you know which line each part of a letter should touch, learning the lowercase letters in stroke groups becomes much easier to check by eye.
Choose an x-height for your tool
The x-height sets the size of everything else, so choose it to suit the pen in your hand.
- Small-tip brush pen or pointed nib: an x-height of about 5 to 7 mm (roughly 3/16 to 1/4 in) is comfortable for many beginners. Smaller hides little and demands fine control; larger asks more of the arm.
- Large-tip brush pen: the thick strokes are wide, so the letters need more room. Try 12 to 15 mm (about 1/2 to 5/8 in) and adjust.
- Broad-edge pen: letter height is counted in nib widths, not millimeters. Many hands use an x-height of about 4 to 5 nib widths, so a 2 mm nib gives an x-height of roughly 8 to 10 mm.
For the spaces above and below, a simple starting point is to make the ascender space and the descender space each equal to the x-height. Some traditional scripts use taller ascenders and deeper descenders. You can change the ratio later, once the letters feel familiar.
Rule the horizontal lines
The example below uses a 6 mm x-height with equal spaces above and below. One set of lines is then 18 mm tall. A 4 mm gap between sets keeps the descenders of one row clear of the ascenders of the next, so the pattern repeats every 22 mm.
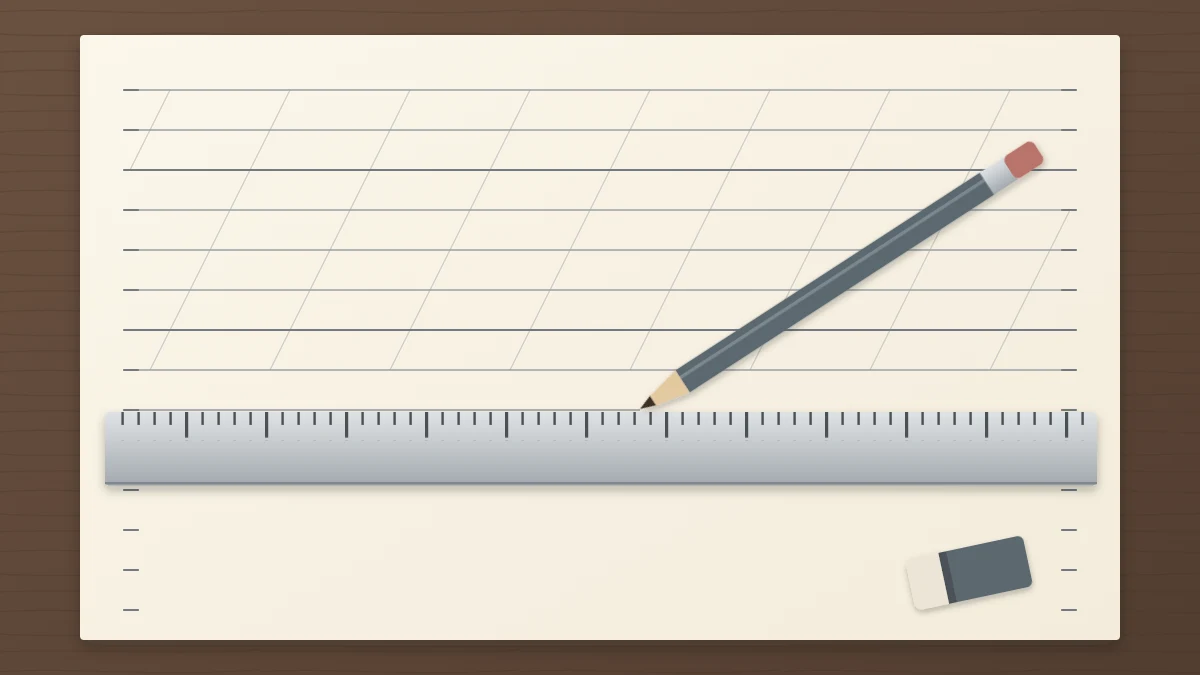
- Lay the ruler down the left margin of the sheet with its zero about 20 mm (roughly 3/4 in) below the top edge.
- Without moving the ruler, make small pencil ticks at 0, 6, 12 and 18 mm. These are the ascender line, waistline, baseline and descender line of the first row.
- Keep going with running totals: 22, 28, 34 and 40 mm for the second row, then 44, 50, 56 and 62 mm for the third, and so on down the page.
- Repeat exactly the same ticks down the right margin, starting the same distance below the top edge.
- Join each pair of ticks with a light, sharp pencil line.
Reading running totals from a ruler that stays still matters more than it sounds. If you measure each 6 mm step separately, small errors add up, and the last rows end up visibly taller or shorter than the first.
On a letter-size sheet, which is 11 in (about 279 mm) tall, ten rows need 216 mm: ten sets of 18 mm plus nine gaps of 4 mm. That leaves comfortable margins at the top and bottom.
Add slant lines
Slant lines are only as useful as they are parallel. Many traditional pointed-pen scripts lean at roughly 55 degrees measured from the baseline, while modern styles are often more upright. Any lean works as long as it stays the same, which is the subject of the guide to keeping your letters leaning the same way.
With a protractor
Set the protractor on a baseline, mark your chosen angle, and draw one long diagonal through the mark across the whole sheet.
With a folded paper angle
If you have no protractor, a slope of 7 across and 10 up gives roughly 55 degrees. On a scrap sheet with a straight bottom edge, measure 70 mm along the edge and 100 mm straight up from that point, then draw the diagonal between the start and the top mark. Fold the scrap along that diagonal. The folded edge is now a reusable angle: set its bottom edge on any baseline and rule along the fold.
Repeating the line
From your first diagonal, make ticks every 10 mm along the top horizontal line and again along the bottom one. Join the matching ticks. The lines are a guide for the eye, not a grid to fill, so you do not need one for every letter.
Make one dark master sheet
Ruling every practice page is slow, and pencil lines under ink have to be erased. A master sheet solves both. Rule one sheet carefully, then go over the lines with a fine black pen so they are dark and crisp.
Slide the master under a thin sheet and the lines show through. Hold the two together with paper clips so they cannot shift while you write. How well this works depends on the top sheet, so look at the guide to choosing paper that does not bleed for the smooth, thin types that suit it.
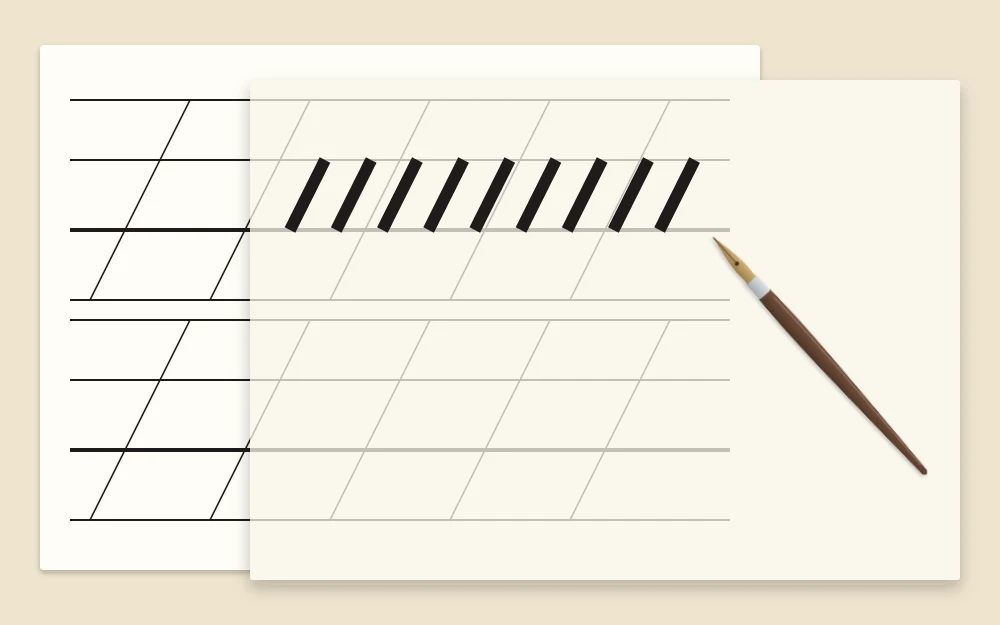
For heavier paper or card that hides the master, rule light pencil lines directly on the surface and erase them once the ink is fully dry.
Check your lines before you write
A minute of checking saves a page of confusing practice.
- Measure the x-height at the left, middle and right of one row. All three should match.
- Compare the first and last slant lines with your folded angle or protractor.
- Write one row of downstrokes. If they feel cramped or oversized, change the x-height by 1 mm and rule a new master.
Frequently asked questions
What x-height should a beginner use?
It depends on the pen. With a small-tip brush pen or a pointed nib, many beginners are comfortable at about 5 to 7 mm. A large-tip brush pen needs more room, and a broad-edge pen is usually set at around 4 to 5 widths of its own nib. Treat these as starting points and adjust.
Do I need slant lines for every style?
No. Slant lines help most with leaning scripts, where the eye struggles to keep every downstroke parallel. For an upright style, vertical lines or no slant lines at all can be enough. If your letters lean in different directions, adding a few diagonals is a quick way to steady them.
Can I see a master sheet through any paper?
Only through fairly thin, smooth sheets such as layout or marker paper. Heavier paper and card block the lines. In that case, rule light pencil guidelines directly on the surface, write over them, and erase gently after the ink has dried completely.