Basic Calligraphy Strokes: The 8 Shapes Behind Every Letter
Meet the eight basic strokes of pressure-based calligraphy: what each one is, how the pressure changes inside it, which letters use it, and how to practice a row of each between guidelines.
Practice at a glance
What you need
- Small-tip brush pen or pointed nib in a holder
- Smooth practice paper
- Pencil and ruler
- Eraser
- Ink and a scrap sheet if using a nib
Almost every lowercase letter in a pressure-based script is assembled from a handful of repeated shapes. Learn those shapes first and the alphabet stops being twenty-six separate problems. The basic calligraphy strokes are that handful: eight short marks you can practice on their own, one row at a time.
This guide names each of the eight, describes how the pressure changes inside it, and lists the letters that depend on it. It applies to a small-tip brush pen and a pointed nib alike.
Why strokes come before letters
A letter asks you to do several things at once: change pressure, hold a slant, turn a curve, and stop at the right height. A single stroke asks for one or two. Practicing strokes lets you fix one problem at a time, and the fix carries over to every letter that uses the stroke.
Letters built from the same strokes also share the same curves and thick lines, so a word looks like one family of shapes.
The idea behind all eight
Every stroke below follows one habit: light pressure when the pen travels up, more pressure when it travels down. Upward lines come out thin, downward lines come out thick, and the change between them is gradual. If that contrast is still new to you, spend a session on thin upstrokes and thick downstrokes before working through the full set.
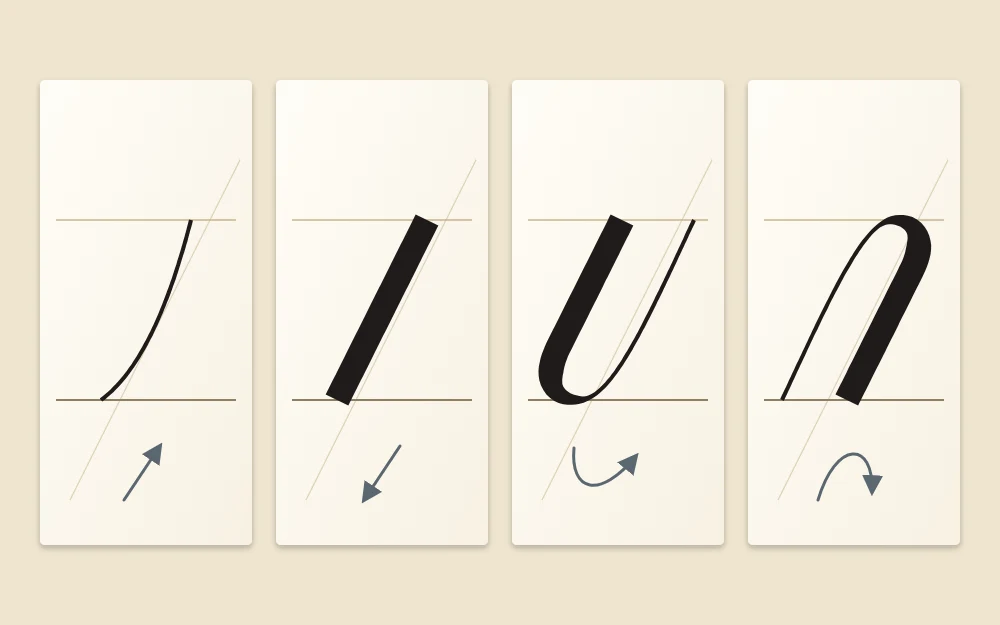
The first four strokes
1. Entrance stroke
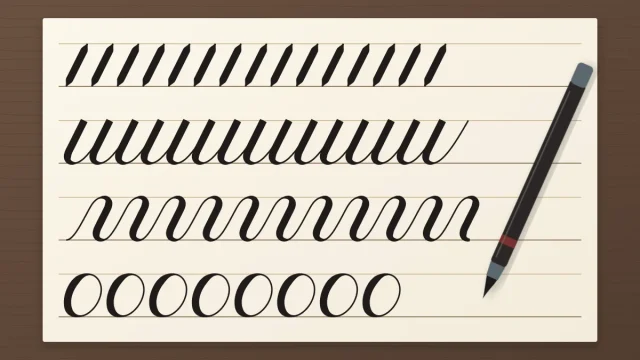
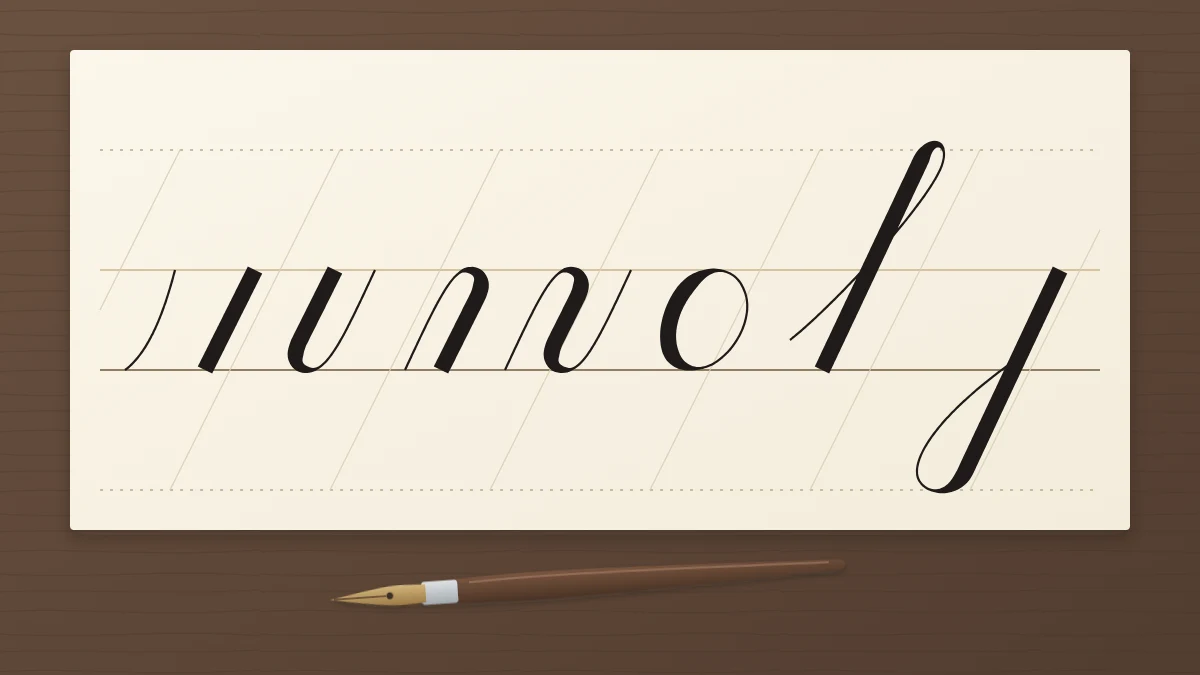
A thin upstroke that starts at the baseline and rises in a gentle curve to the waistline. Pressure stays light the whole way, so the line is a hairline. It leads into letters such as i, u, w, r and s, and a similar thin line links one letter to the next.
2. Downstroke
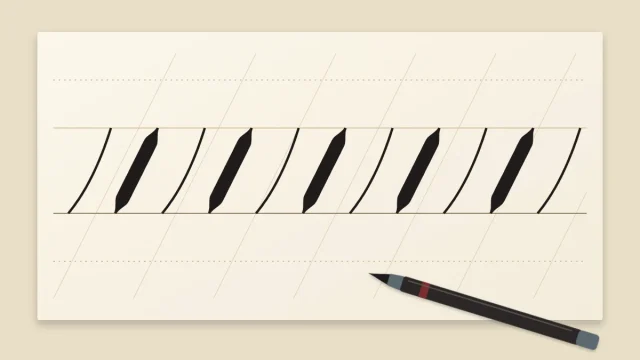
A straight, thick line pulled from the top line to the baseline at full pressure, with the same width from start to finish. It is the stem of t, the tall parts of d and p, and the backbone of most other letters. Its lean sets the slant of everything else.
3. Underturn
A u shape. Start at the waistline with full pressure, pull down, begin releasing a little above the baseline, round the bottom, and travel back up as a hairline. You will find it in i, u, w, t and the last part of a and d.
4. Overturn
The underturn upside down, an arch. Start at the baseline with a thin upstroke, curve over the top at the waistline, then add pressure gradually and come down thick. It forms the humps of n and m and the start of several other letters.
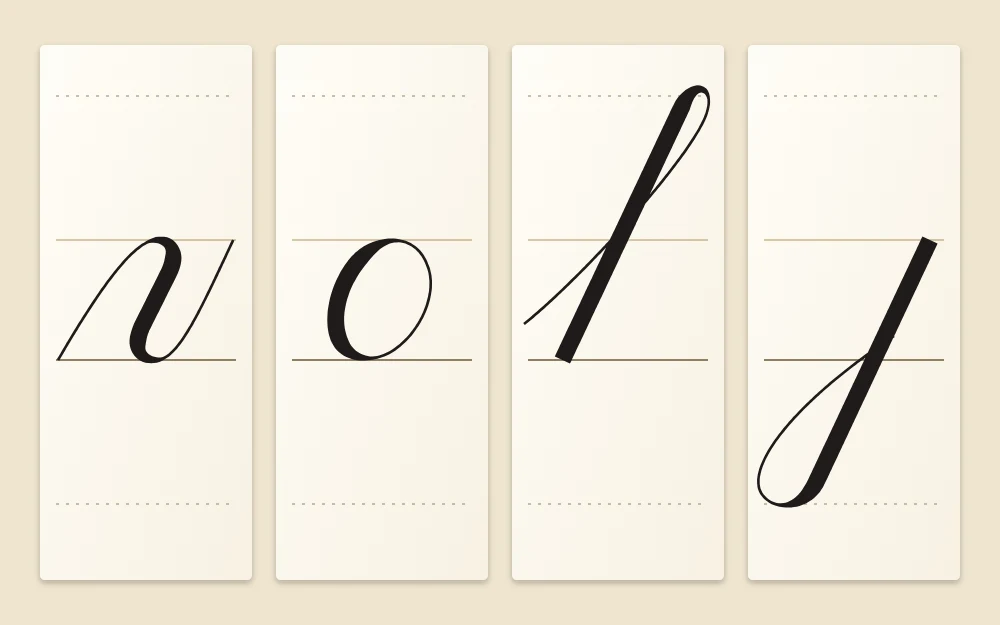
The second four strokes
5. Compound curve
An overturn and an underturn joined into one wave: thin up, thick down, thin up again. The two hairlines should be parallel, with the thick line centered between them. It finishes n and m and makes most of h, v, x and y.
6. Oval
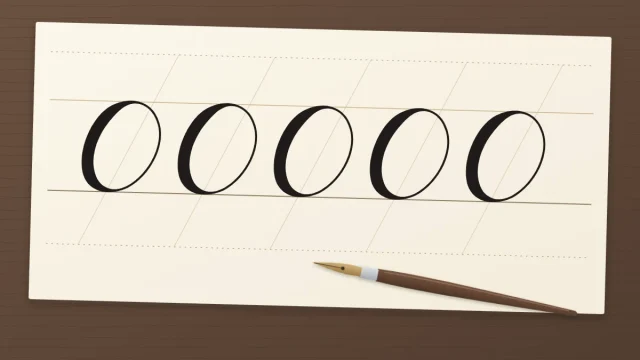
A closed, leaning egg shape made counterclockwise, thick down the left side and thin up the right. It is the body of a, c, d, e, g, o and q, and most people find it the hardest of the eight. It has its own guide to practicing the oval stroke.
7. Ascending loop
A thin upstroke that climbs from the waistline to the ascender line, curves over to the left, and comes straight down to the baseline at full pressure. The loop itself is narrow and made entirely of hairline. It is the tall part of b, f, h, k and l.
8. Descending loop
The mirror of the previous stroke. A thick downstroke drops from the waistline to the descender line, releases, curves left, and returns upward as a hairline that crosses the stem near the baseline. It forms the tails of g, j and y.
All eight at a glance
| Stroke | Pressure | Letters that use it |
|---|---|---|
| Entrance stroke | Light throughout | i, u, w, r, s |
| Downstroke | Full throughout | t, d, p |
| Underturn | Full, then light | i, u, w, t, a, d |
| Overturn | Light, then full | n, m |
| Compound curve | Light, full, light | n, m, h, v, x, y |
| Oval | Full on the left, light on the right | a, c, d, e, g, o, q |
| Ascending loop | Light up, full down | b, f, h, k, l |
| Descending loop | Full down, light up | g, j, y |
Exact letter recipes differ a little from one script to another, so treat the last column as a general map.
How to practice a row of each
You need lines to write between, because the strokes are defined by where they start and stop. Rule a baseline, a waistline, an ascender line and a descender line in pencil, or follow the steps for ruling your own calligraphy guidelines. An x-height of about 5 to 7 mm (about 3/16 to 1/4 in) suits a small brush pen or a pointed nib.
- Pick one stroke and write it slowly across a whole row, lifting the pen after each one.
- Leave about the same gap between strokes, roughly the width of the stroke itself.
- Stop at the end of the row and circle the two best shapes with a pencil.
- Write a second row, trying to match the ones you circled.
- Move to the next stroke in the order above.
Tip
Two careful rows of each stroke fill about one page and take roughly 15 to 20 minutes. A short session you repeat often tends to be more useful than a long one you dread.
What good looks like
You do not need a teacher to judge a row. Check three things:
- Parallel downstrokes. Every thick line leans at the same angle, including the thick sides of ovals and loops.
- Smooth pressure changes. Thick narrows into thin over a short distance, with no sudden step and no blob at the turn.
- Even spacing. The white gaps between strokes look about equal across the row.
Wobbly hairlines are normal at first and usually steady with repetition.
Moving from strokes to letters
Once the rows look reasonably even, start combining. An oval followed by an underturn is an a. An ascending loop followed by a compound curve is an h. An overturn plus a compound curve is an n. The guide to lowercase calligraphy letters groups the alphabet by stroke so you can add a few letters at a time.
When a letter goes wrong later, the cause is almost always one of these eight shapes.
Frequently asked questions
How long should I practice basic strokes before writing letters?
There is no fixed amount. A common approach is to move on when your rows look reasonably even in slant, width and spacing, which may take a few sessions or a few weeks. You can also mix the two: a row of strokes, then the letters that use them.
Do the eight basic strokes work with a brush pen?
Yes. A small-tip brush pen and a pointed nib both make a thin line with light pressure and a thick line with more pressure, so the same eight shapes apply. Brush pens are often easier at the start because there is no ink to load and the tip glides in every direction.
Are these strokes used for broad-edge calligraphy too?
Not in the same way. A broad-edge pen makes thick and thin from the angle of its flat nib instead of from pressure, and its scripts are built from a different set of strokes. The eight shapes here belong to pressure-based scripts written with a pointed nib or a brush pen.