Upstrokes and Downstrokes: Thin and Thick Lines Explained
Light pressure going up, more pressure coming down: the one rule behind thick and thin lines, with four practice stages and advice on where the pressure should change.
Practice at a glance
What you need
- Small-tip brush pen or pointed nib in a holder
- Smooth practice paper
- Pencil and ruler
- Ink if using a nib
If every line you write comes out the same thickness, the letters may be well shaped and still not look like calligraphy. The missing piece is contrast, and contrast comes from upstrokes and downstrokes being treated differently: one light, one heavy.
That is close to the only rule a pressure-based script has. The rest of this guide explains the rule, shows where the pressure should change, and gives you a short sequence of rows to practice it with a brush pen or a pointed nib.
The one rule: light going up, heavier coming down
When the pen travels up the page, away from you, touch the paper as lightly as you can. The result is a thin upstroke. When the pen travels down, toward you, press more. The flexible tip widens and leaves a thick downstroke.
The direction decides the pressure, not the letter. A stroke that moves sideways or curves over a top is treated as light. Only the downward part of a shape gets weight.
There is a practical reason behind the rule as well as a visual one. A flexible tip pulled toward you opens smoothly. Pushed upward under pressure, a pointed nib can dig into the paper and a brush tip can buckle, so light upstrokes are also kinder to the tool.
What a hairline is
A hairline is the thinnest line your pen can make: the mark left when only the very point touches the paper. Upstrokes are hairlines. So are entrance strokes, exit strokes and the links between letters.
How thin a hairline gets depends on the tool. A pointed nib can leave a line almost as fine as a pencil mark, while a small-tip brush pen leaves a slightly fuller one. Either is fine. What matters is the difference between your thin and your thick, and that the thin lines match each other.
Practice in four stages
Rule a baseline and a waistline in pencil first, with a few slanted lines across them to keep the lean steady. Then work through these stages in order, one or two rows each.
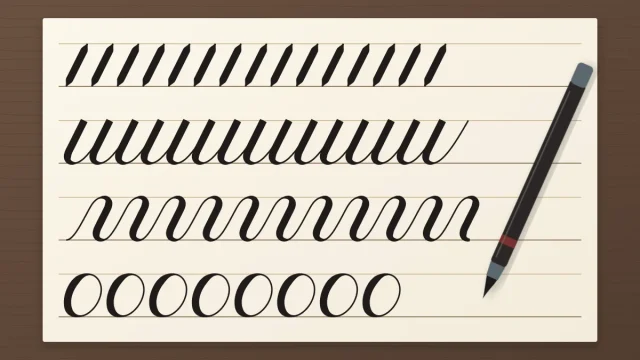
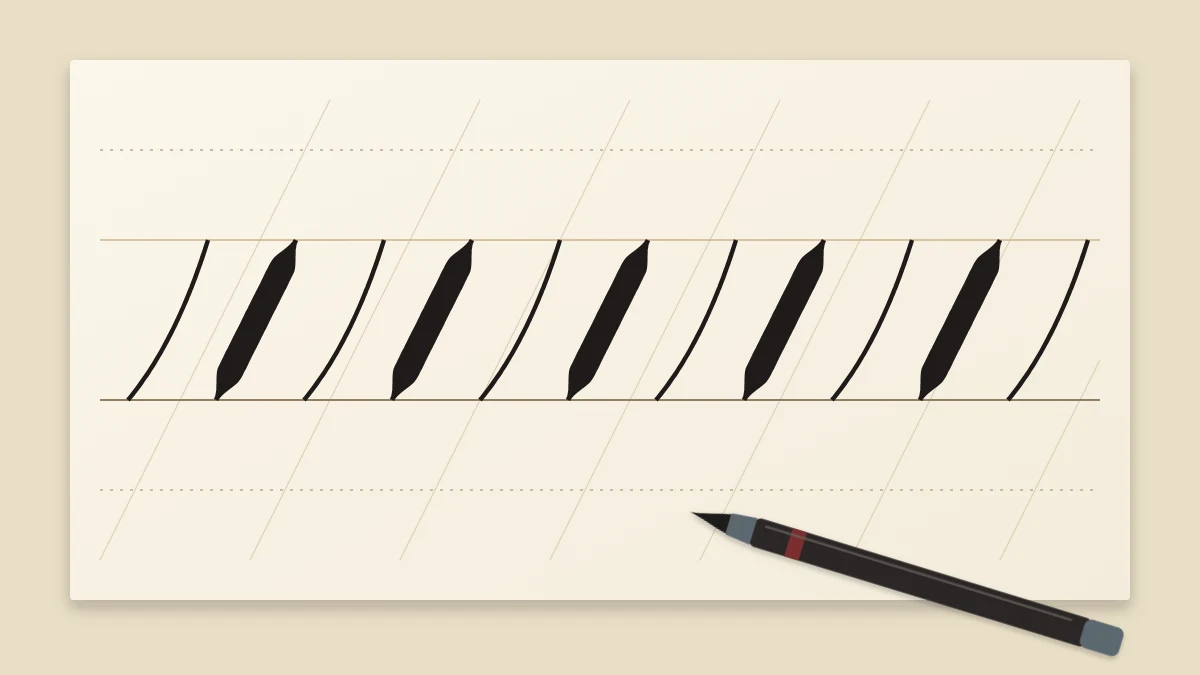
- A row of upstrokes. Start at the baseline and glide up to the waistline with almost no pressure. Lift the pen. Repeat across the row, keeping the gaps even.
- A row of downstrokes. Start at the waistline, press, and pull down to the baseline at one steady width. Lift. Aim for every stroke to be as thick as the one before it.
- Alternating strokes. Write one thin upstroke, lift, then one thick downstroke beside it, lift, and continue. Switching back and forth trains your hand to change pressure on purpose.
- Joined strokes. Stop lifting. Go up thin, come down thick, go up thin again to make a zigzag. Then round off the bottoms so the zigzag turns into a row of underturns.
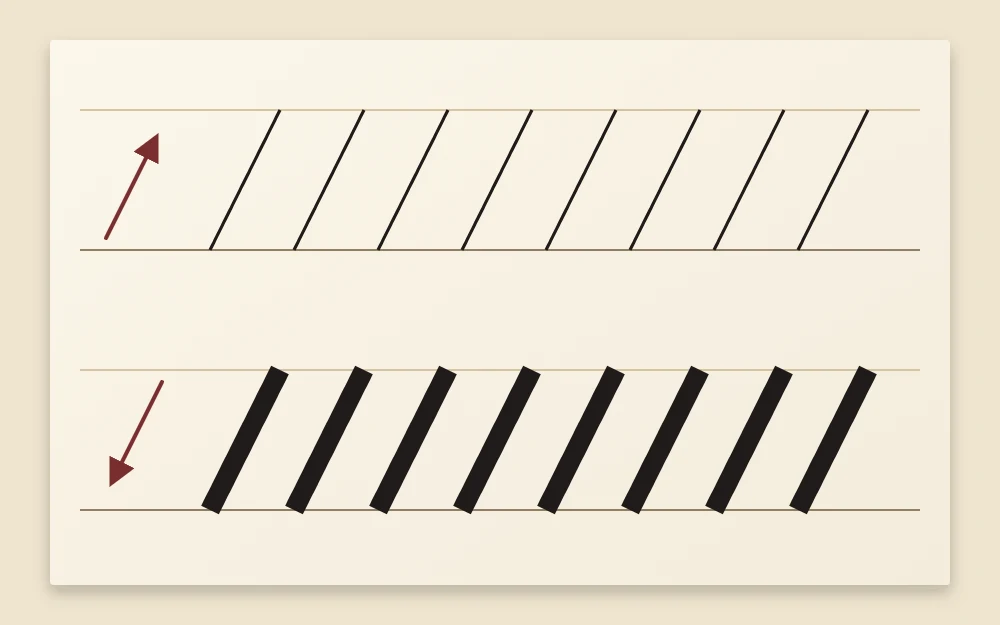
A page holding all four stages takes about 10 to 15 minutes.
Where to change pressure
In joined strokes, the pressure has to change somewhere, and the place is the turn. The change is gradual. A switch flipped at the very bottom leaves a thick blob or a sharp corner.
- At the bottom of a turn: begin easing off a little above the baseline, so the line is already narrowing as it rounds the curve. By the time the pen starts to climb, it should be at hairline pressure.
- At the top of a turn: come over the curve still light, and add pressure only once the pen is clearly heading down. The stroke reaches full width a short way below the top.
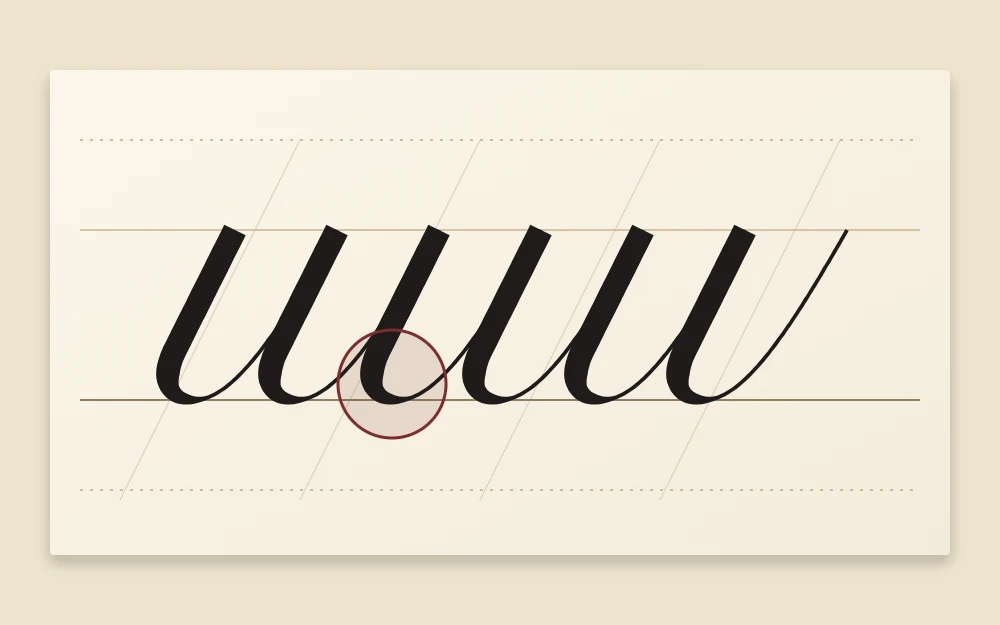
This taper is the detail that takes longest to settle. The article on controlling pen pressure goes further into it, with exercises for holding each downstroke at the same width and releasing smoothly.
Why slow is fine
Each pressure change needs a moment. Writing at handwriting speed leaves no time for the tip to open and close, which is one of the most common reasons lines come out the same thickness.
Slow down until you can feel the tip widen as you press and narrow as you let go. Calligraphy written at that pace is normal, not a beginner stage you are meant to leave behind.
Tip
Say “light” on each upstroke and “press” on each downstroke, out loud or in your head. Naming the pressure keeps you from drifting back into one even line.
Brush pen and pointed nib: the same idea
Both tools respond to pressure, so the rule does not change. What changes is how the tip gives.
With a brush pen, light pressure means writing on the very point of the tip, and more pressure means letting the side of the tip lie down on the paper. Holding the pen at a lower angle to the page makes this easier. A small-tip brush pen is a forgiving place to start, and the guide to brush pen calligraphy covers choosing and handling one.
With a pointed nib, pressure spreads the two tines apart and ink fills the gap between them. Upstrokes need an especially light touch, because the point is sharp and catches on paper fibers if it is pushed. Smooth paper helps a great deal.
If your grip tightens as you concentrate, pause, loosen your fingers and shake out your hand. A relaxed hold makes light upstrokes much easier to find.
If your lines still look the same
- Everything is thick: you are resting the weight of your hand on the tip. Try upstrokes that barely leave a mark, then add just enough pressure to make them continuous.
- Everything is thin: press more than feels polite on the downstroke. Flexible tips are built to open.
- Thick in the wrong places: check the direction of travel. Weight belongs only where the pen moves down.
- The tool does not respond: a hard fineliner or ballpoint cannot vary its line. You need a brush tip or a flexible pointed nib.
What to practice next
Once thin and thick arrive where you intend, the zigzags and underturns from stage four lead straight into the rest of the eight basic strokes. Each of them is a different arrangement of the same two pressures you have just practiced.
Frequently asked questions
Why are my upstrokes shaky?
Thin lines show every small movement, so some wobble is expected at first. Moving the whole forearm instead of only the fingers, keeping the grip loose and using smooth paper usually steadies them. Going a little faster on the upstroke alone can also help, as long as the pressure stays light.
How thick should a downstroke be?
As thick as your tool gives comfortably, without forcing it. The exact width matters less than keeping it the same from one downstroke to the next. For small writing, a moderate thick line often looks cleaner than the widest line the tip can produce.
Can I get thick and thin lines with an ordinary pen?
Not from pressure. A ballpoint, gel pen or hard fineliner makes one line width however hard you press. Pressure-based calligraphy needs a tip that flexes, such as a brush pen or a pointed nib in a holder.