Brush Pen Calligraphy for Beginners: Pressure Without the Ink Bottle
How a brush pen makes thick and thin strokes, which tip size suits small guidelines, how to hold it at a low angle, first exercises to try, and how to keep the tip from fraying.
Practice at a glance
What you need
- Small-tip brush pen
- Smooth marker or layout paper
- Pencil and ruler
- Soft eraser
A brush pen is the quickest way to feel what calligraphy is about. There is no bottle to open and nothing to rinse: you take off the cap, press a little, and the line swells; you ease off, and it thins again.
That makes brush pen calligraphy a comfortable starting point if you want to learn pressure control with as little setup as possible. This guide explains what the tool is, how to hold it so the thick strokes come easily, which exercises to try first, and where its honest limits are.
What a brush pen is
A brush pen looks like a marker, but its tip is flexible. Most have a tapered felt or foam tip; some have a bundle of fine synthetic bristles like a small paintbrush. In both cases the tip bends when you press and springs back when you lift.
That flex is what produces thick and thin. With almost no pressure, only the very point touches the paper and you get a fine line. With more pressure, the tip bends over and its side lies on the paper, leaving a broad line. The ink is stored inside the barrel, so the supply stays steady from stroke to stroke.
Small tip or large tip
Brush pens come in two broad sizes, and the choice changes how large you need to write.
| Small-tip brush pen | Large-tip brush pen | |
|---|---|---|
| Feel | Firm, with a short flex | Soft, with a long flex |
| Comfortable letter size | An x-height of about 5 to 7 mm (roughly 3/16 to 1/4 in) | An x-height of around 15 mm (about 5/8 in) or more |
| Movement | Mostly fingers and hand | More of the whole arm |
For small guidelines, a small tip is usually the easier start. Its firmness forgives a heavy hand, and the letters come out at a size close to ordinary handwriting. A large tip makes bold, expressive strokes but needs tall guidelines and more control over a very soft point. These sizes are starting points; adjust the height until your thick and thin strokes look balanced.
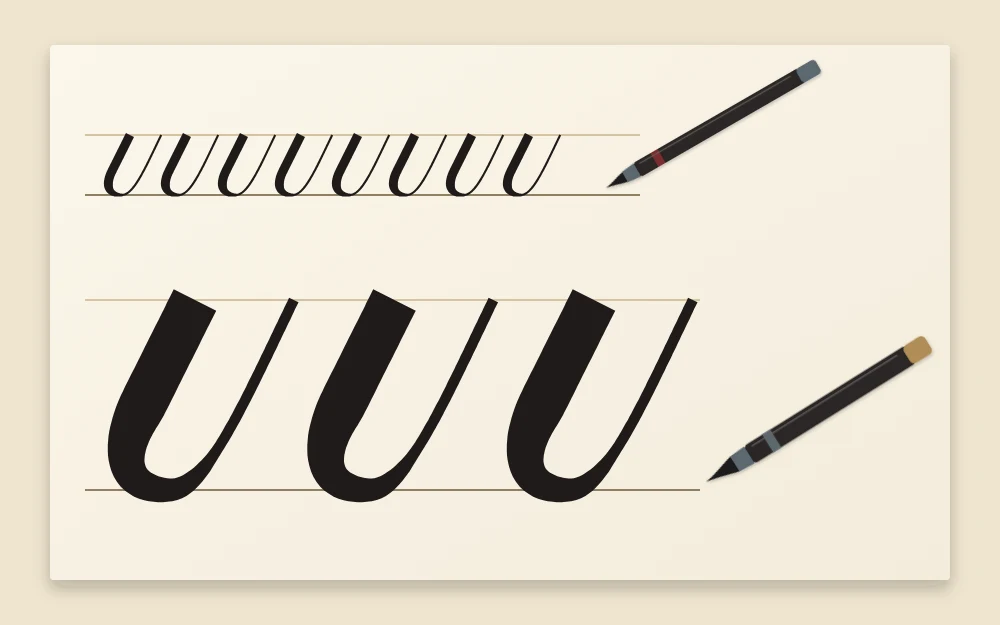
If you are still choosing supplies, the starter kit overview lists what goes alongside the pen.
Hold it at a low angle
The most useful adjustment for a new brush pen user is to tilt the pen down. Many people start with it nearly upright, the way they hold a ballpoint. Held steeply, only the point can reach the paper, so pressing harder just crushes the tip.
Try letting the barrel lean back toward your hand, somewhere around 45 degrees to the paper, as a common starting point. Now when you press, the tip bends sideways and the side of it makes the thick stroke. The point stays protected and the thick line comes with much less force.
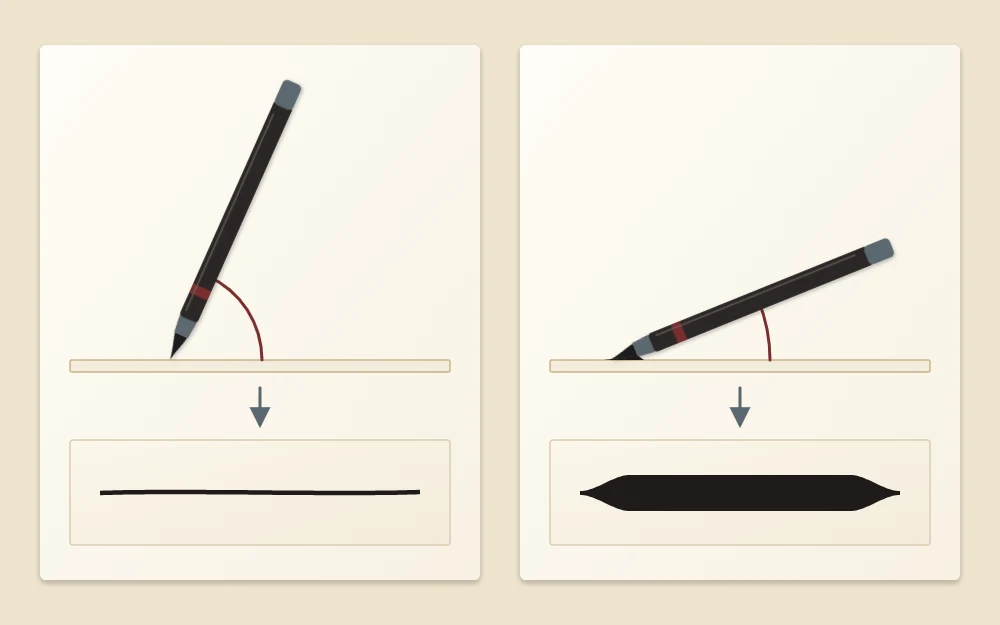
Hold the pen a little farther back from the tip than you would a ballpoint, and keep your fingers relaxed. Left-handed writers often find it helps to turn the paper or change the tilt; adjust until the tip flexes smoothly and your hand is comfortable. If something starts to hurt, stop and change your setup.
A light touch on the upstroke
The thick downstroke tends to arrive quickly. The thin upstroke is the part that takes patience, because it asks for almost no pressure at all while the pen moves away from you.
Think of the tip skimming the paper. Slow down, let just the point touch, and accept a slightly wobbly line at first; steadiness comes from repetition. The contrast between the two is the heart of the craft, and the guide to upstrokes and downstrokes looks at each one closely.
First exercises
Rule a few sets of guidelines in pencil at a height that suits your pen, then work through these in order. A session of about 15 to 20 minutes is plenty.
- Thin lines up. Fill a row with upstrokes from the baseline to the waistline, using the least pressure you can.
- Thick lines down. Fill a row with downstrokes, pressing as the pen moves toward you. Aim for the same width from top to bottom.
- Thick to thin. Start a downstroke thick and release the pressure gradually so it tapers to a fine line before the baseline.
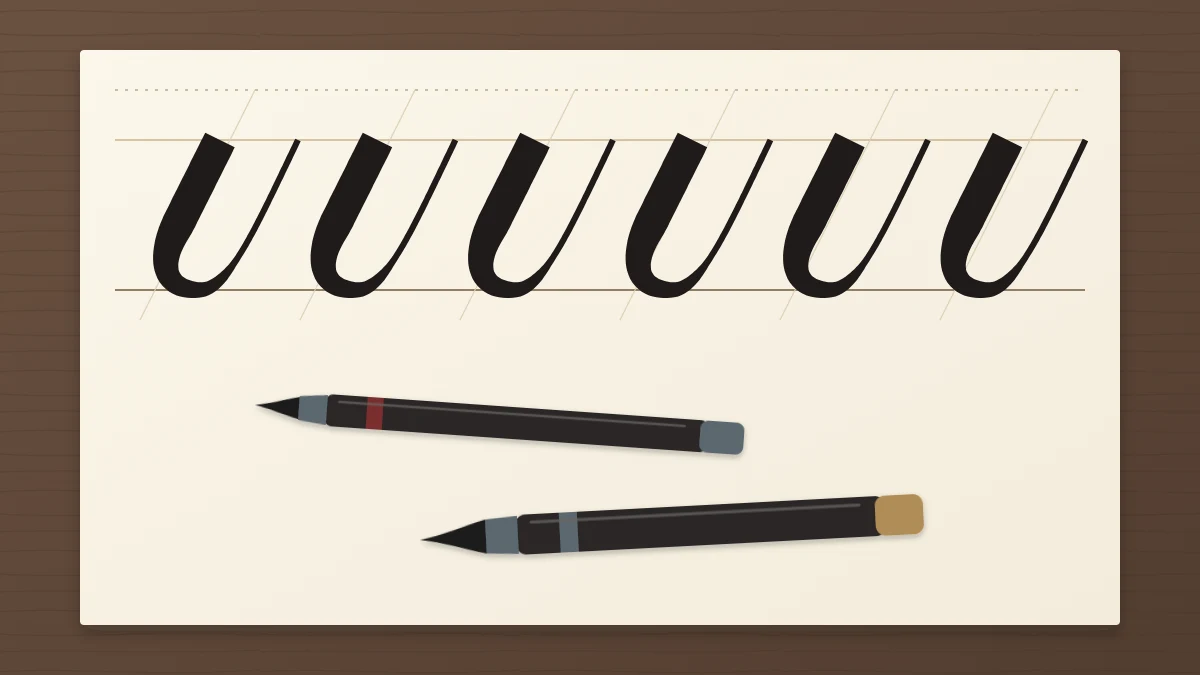
- Underturns. Come down thick, ease off as you round the bottom, and travel back up thin. This is the first stroke where the transition has to happen on a curve.
- Overturns. The reverse: up thin, over the top, then press as you come down.
Changing pressure smoothly in the middle of a stroke is a skill of its own. For drills that isolate it, see the pen pressure exercises.
Tip
Go slower than feels natural. Calligraphy strokes are made one at a time with a small pause between them, which gives you a moment to reset the pressure before the next one.
Looking after the tip
A brush pen is a consumable tool, but a few habits make it last noticeably longer:
- Write on smooth paper. Textured paper wears felt tips and makes them fray. Marker, layout and tracing papers are gentle on them.
- Cap it as soon as you stop, even for a short break, so the tip does not dry out.
- Store it flat unless the maker says otherwise, so ink stays evenly spread inside the barrel.
- Do not push upward with pressure. Forcing the tip into the paper on upstrokes splits it quickly.
Honest limits
A brush pen does not do everything. Its hairlines are thicker than those of a metal nib, so the contrast between thick and thin is gentler. Tips wear: over time the point rounds off and the thin strokes fatten, which is normal and not a sign that you are doing something wrong.
How the skills transfer to a dip pen
Nearly everything carries over. Pressure on the way down, release on the way up, slow separate strokes, consistent slant and spacing: a pointed nib asks for exactly the same habits. The eight basic strokes are the same shapes with either tool.
What changes is the feel. A nib is sharper and less forgiving on upstrokes, needs less force to open, and has to be dipped and cleaned. Time spent with a brush pen means that when you do pick up a nib, you only have to learn the tool, because your hand already knows the strokes.
Frequently asked questions
Is a brush pen easier than a dip pen for a beginner?
For most people the setup is easier, because there is no ink to manage and the felt tip glides over paper without catching. The pressure skill itself takes similar practice with either tool. Many beginners start with a brush pen to learn the strokes and add a nib later.
Why are my brush pen upstrokes too thick?
Usually there is still some pressure on the tip as it travels upward, or the pen is tilted so low that the side of the tip stays on the paper. Slow down, lift until only the point touches, and check that the tip has not worn round. A larger letter size can also help.
How long does a brush pen tip last?
It varies with the paper, your pressure and how much you write, so there is no fixed figure. On smooth paper with a light upstroke a tip keeps its point for a good while; on rough paper it can fray within a few sessions. When thin strokes will not stay thin, retire the pen to rough drills.