Calligraphy Drills: 7 Warm-Up Exercises Before You Write
Seven short warm-up drills, what each one trains, how long to spend on them, and how to use the same sheet to check your pen, ink and paper before you start writing.
Practice at a glance
What you need
- The pen you plan to write with
- A scrap sheet of the same paper
- Pencil and ruler
- Ink if using a nib
The first few lines of any session are usually the worst ones. The hand is stiff, the pressure is uneven, and the pen has not settled. Calligraphy drills exist so that those rough minutes land on a scrap sheet instead of on the piece you care about.
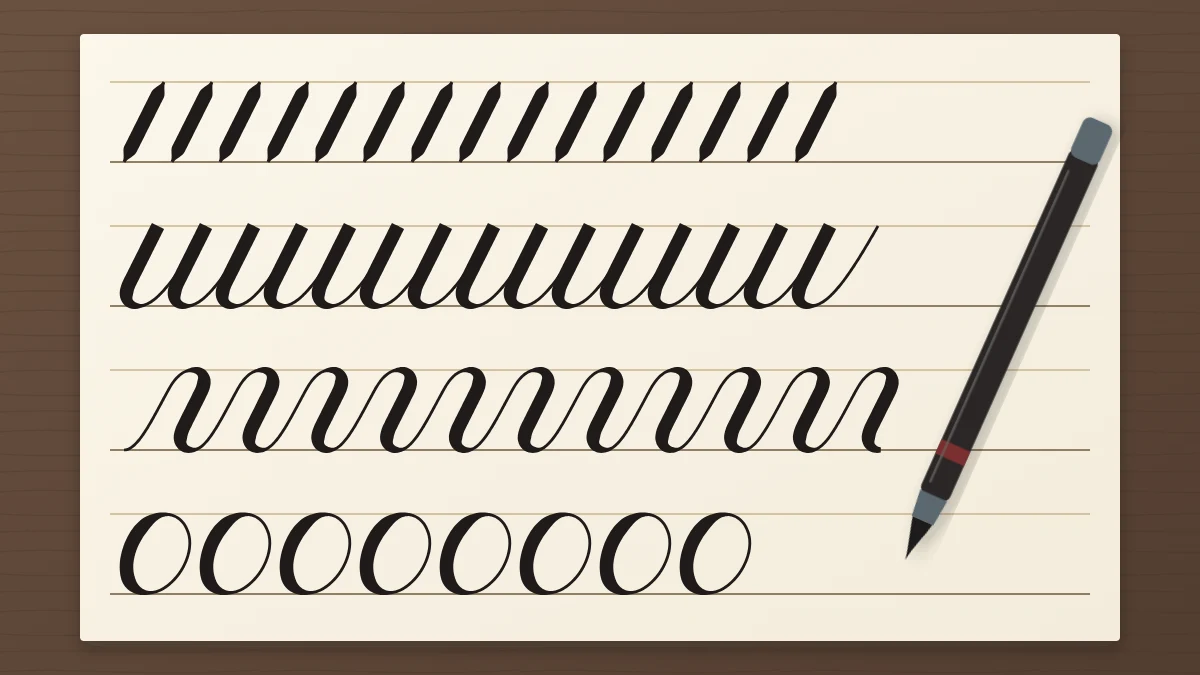
The seven drills below are plain repeated shapes, in an order that moves from simple to demanding. Each one trains a specific thing, so you can pick the two or three that match what you are about to write.
What a warm-up is for
A warm-up does three jobs. It loosens the movement of your hand and arm, it reminds you of the two pressures before you need them in a letter, and it gives you a quick look at how today’s pen, ink and paper are behaving together.
Drills are not where the shapes are first learned. Each stroke is described in full in the guide to the eight basic strokes; the drills here assume you have met them and want to get them moving.
Before you start
Use the same pen and the same kind of paper you plan to write on, with pencil guidelines at the size you will be using. Sit comfortably, rest your forearm on the table and keep your hold on the pen loose. If you are unsure about your grip, the suggestions in how to hold a calligraphy pen are a reasonable starting point to adjust from.
The seven drills
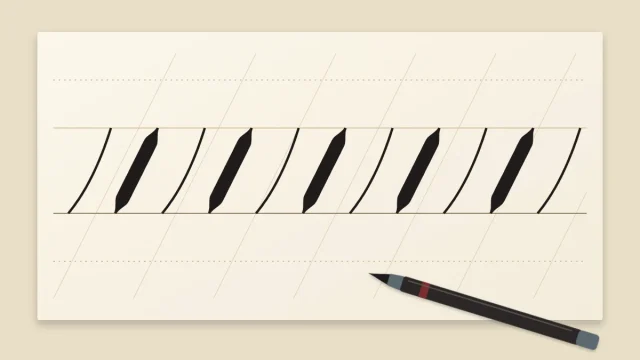
1. Parallel slanted lines
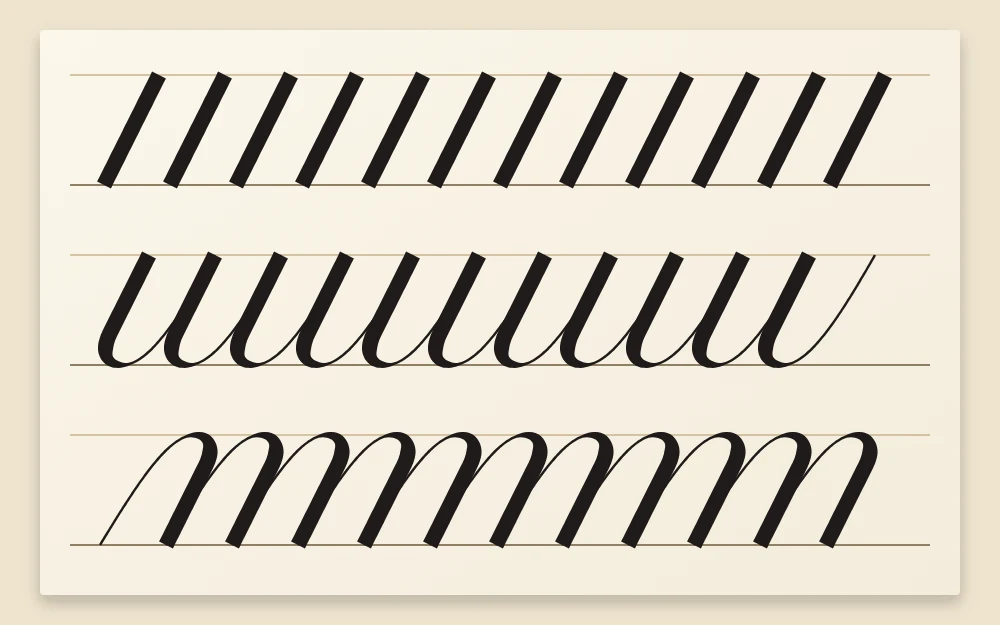
Fill a row with thick downstrokes, evenly spaced, all leaning the same way. Trains: a steady slant and a matching stroke width. It is the simplest drill and the most revealing; if these lines fan out, so will your letters.
2. Pressure ladders
Make one long slanted stroke that begins as a hairline, swells gradually to full width in the middle and tapers back to a hairline. Trains: smooth pressure changes, with no sudden steps.
3. A row of underturns
Write joined underturns across the row without lifting, like a line of the letter u. Trains: releasing pressure before the baseline, and equal gaps between downstrokes.
4. A row of overturns
Write joined overturns, like a line of the letter n. Trains: adding pressure after the top of a curve, which most people find less natural than releasing it.
5. A compound-curve wave
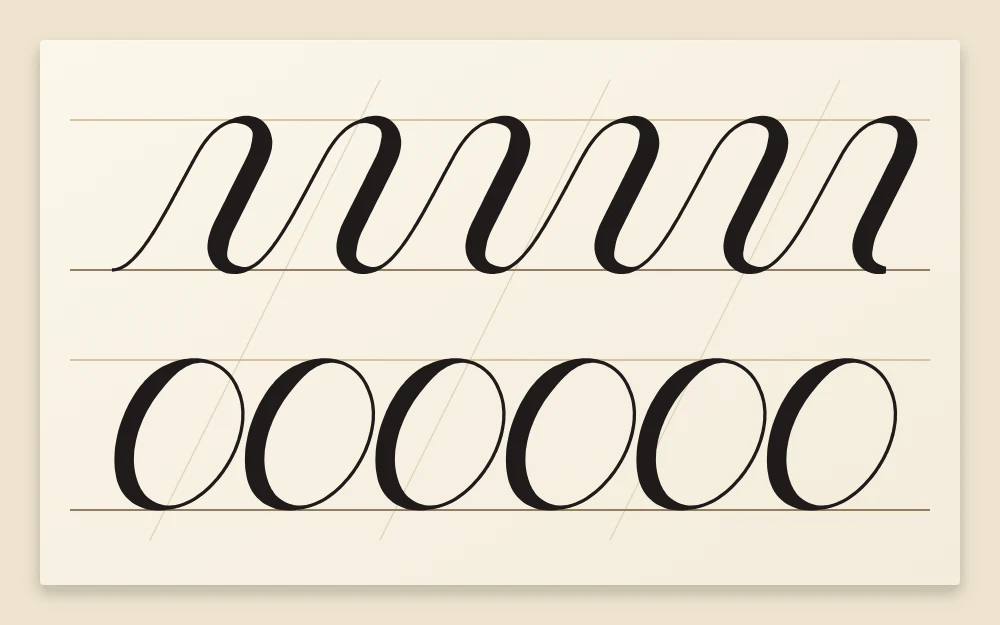
Link compound curves into one flowing wave that runs across the whole line, thick on each downward part and thin on each rise. Trains: rhythm, and keeping the pen moving through two turns in a row.
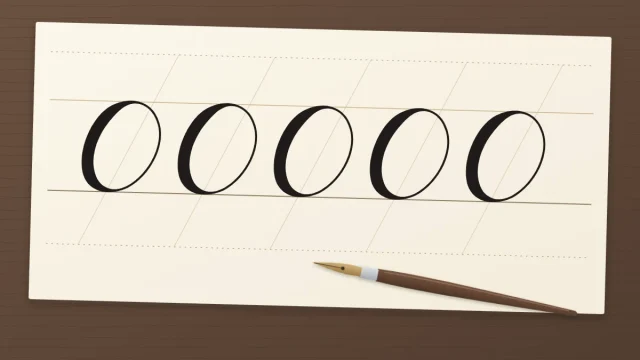
6. Ovals in a row
Write a chain of ovals that just touch each other. Trains: curved movement, consistent width and the lean of round shapes, which is hard to judge on a single oval and obvious in a row.
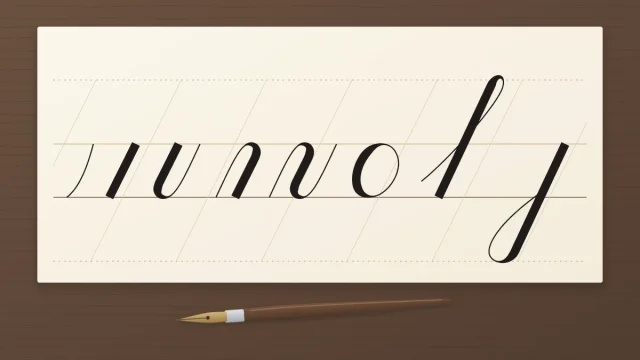
7. Loops
Alternate ascending loops and descending loops along the row, each with a narrow hairline loop and a straight thick stem. Trains: the longer reach above and below the x-height, and keeping tall strokes parallel to short ones.
The drills at a glance
| Drill | What it trains | Useful before |
|---|---|---|
| Parallel slanted lines | Slant and stroke width | Any session |
| Pressure ladders | Gradual transitions | Any session |
| Underturns | Releasing pressure | i, u, w, t |
| Overturns | Adding pressure | n, m |
| Compound-curve wave | Rhythm | h, n, m, v, y |
| Ovals in a row | Round shapes and their lean | a, d, g, o, q |
| Loops | Tall and deep strokes | b, h, l, g, j, y |
How long to spend
A few minutes is enough for most sessions, roughly three to five. That is a suggestion, not a rule. On a day when your hand feels steady from the first line, one row of slanted lines and one of ovals may be all you need. On a stiff day, or with a new pen, a full page is reasonable.
You do not have to run all seven. A sensible short set is the first two drills plus whichever one matches the letters ahead, using the last column of the table. If drills are one part of a longer plan, the article on building a calligraphy practice routine shows where a warm-up fits beside stroke, letter and word practice.
Use the drills to check pen, ink and paper
The warm-up sheet is also a test sheet. While you write the first rows, look for:
- Ink flow. With a pointed nib, does a full downstroke stay solid to the end, or does it run dry or drop a blob? Adjust how deeply you dip before you start the real page.
- Feathering or bleeding. Fuzzy edges or ink showing through the back mean this paper and this ink do not suit each other.
- The tip. A brush pen that no longer comes to a point, or a nib that scratches on upstrokes, will show it within one row of drill two.
- Guideline size. If the ovals feel cramped or the loops feel endless, the x-height may not suit the pen.
Tip
Keep the warm-up sheet beside you while you write. It is the right place to test a tricky letter or to touch off excess ink mid-session.
Warm-up or mindless filling of pages?
Drills are easy to do on autopilot, and a page of shapes written while thinking about something else trains very little. A few signs separate the two:
- A warm-up has one aim per row, such as “same slant” or “release earlier.” Filling has none.
- A warm-up includes a pause at the end of each row to look back along it. Filling moves straight to the next line.
- A warm-up stops when the strokes look settled. Filling stops when the page is full.
- A warm-up leads into something: letters, a word, a short phrase. Filling is the whole session.
If you notice the shapes getting worse along a row, that is usually attention fading, not skill. Stop, rest your hand for a moment, and either write one careful row or move on to your letters.
Frequently asked questions
Do I need to warm up every time I write?
No. A warm-up is a tool, not an obligation. Many people find a row or two makes the first letters steadier, especially with a dip pen or after a break of several days. If you are only writing a quick note and your hand feels ready, you can skip it.
Can I do drills on ordinary lined paper?
You can, as long as the paper is smooth enough for your pen and the ink does not feather on it. Ruled notebook lines give you a baseline, but adding a pencil waistline and a few slant lines makes the drills far more useful for checking height and lean.
Are drills the same as practicing basic strokes?
They overlap, but the purpose differs. Stroke practice is slow, careful work on getting one shape right. Drills repeat shapes you already know, often joined together, to loosen your movement and settle your pressure before the main part of a session.