Lowercase Calligraphy Letters: Learn Them in Stroke Groups
Learn the lowercase alphabet by shared strokes instead of a to z: five letter groups, the strokes each one uses, and what to watch as you assemble every letter.
Practice at a glance
What you need
- Smooth practice paper
- Pencil and ruler
- Small-tip brush pen or pointed nib in a holder
- Ink, if using a dip pen
- Eraser
Once the eight basic strokes feel steady, lowercase calligraphy letters are the natural next step. Nearly every letter in a plain modern script is two or three of those strokes set side by side, so you already know most of the alphabet without having written it.
The usual instinct is to begin at a and work through to z. A calmer route is to learn the letters in families that share a stroke, so each new letter repeats a movement your hand has just practiced. The groups below describe a simple script you assemble yourself with a small-tip brush pen or a pointed nib.
Why stroke groups work better than a to z
Alphabetical order makes your hand change movement with every letter: an oval for a, a loop for b, another oval for c. In a stroke group you repeat one movement many times inside different letters, which is where consistency comes from.
Groups also make problems easier to read. If every letter in a family shows the same wobble, the stroke needs attention, not the letter. Go back to the eight basic strokes for a few lines, then return to the group.
Assemble each letter and lift between strokes
A calligraphy letter is assembled, not written in one continuous line. You make a stroke, lift the pen, place the tip again and make the next stroke. The lift gives you a moment to reset pressure and aim.
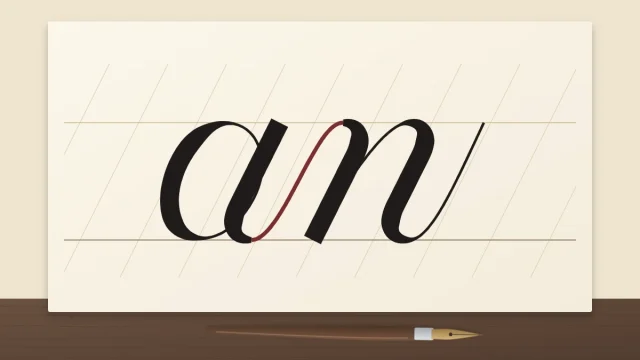
Take the letter n. First comes a thick downstroke from the waistline to the baseline. Lift. Then a compound curve starts at the foot of that stem as a hairline, climbs, arches over, comes down thick and exits as a thin upstroke. Two strokes, one letter.
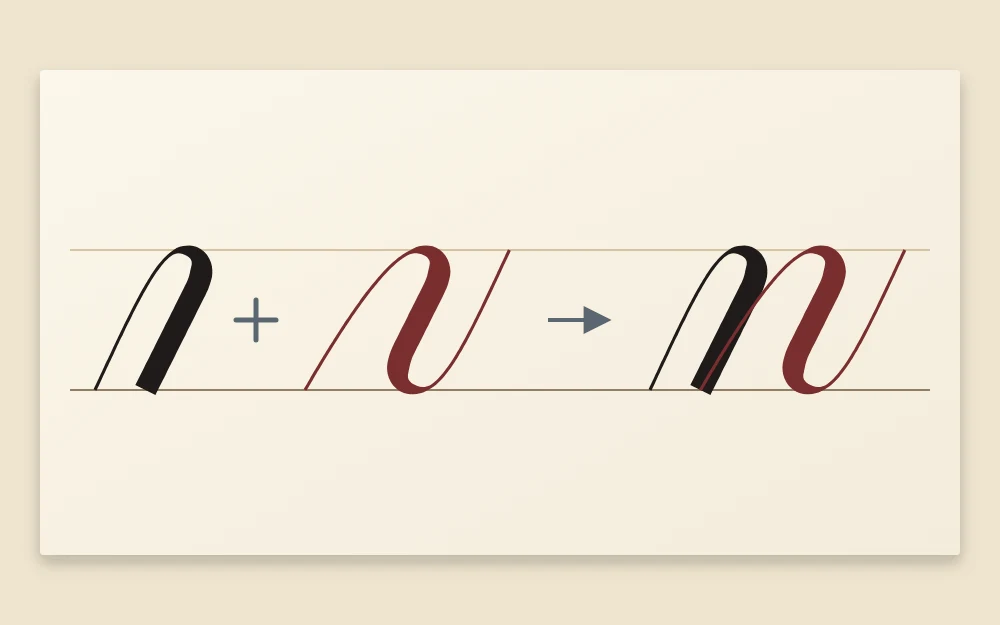
Rule your guidelines before you start. An x-height of about 5 to 7 mm (roughly 3/16 to 1/4 in) suits a small brush pen or pointed nib.
Group 1: underturn letters (i, u, t, w)
These four are the gentlest start. Each is built from a thin entrance stroke and one or more underturns: thick coming down, a narrow curve at the baseline, thin going up.
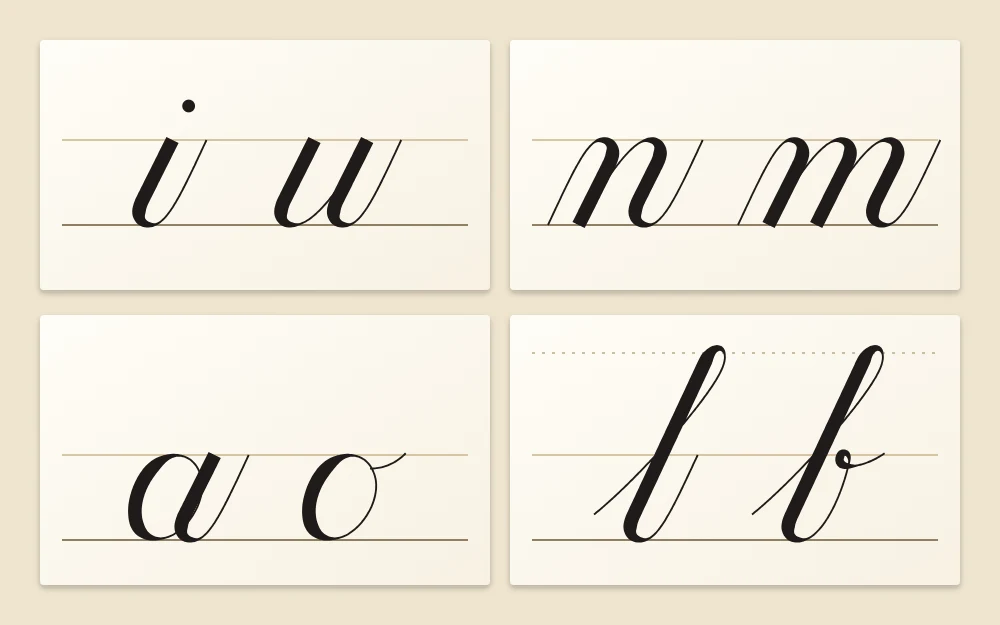
- i: entrance stroke, one underturn, then a dot added last.
- u: entrance stroke and two underturns side by side.
- t: a taller underturn that starts above the waistline, finished with a short hairline crossbar.
- w: two underturns, the second ending in a small high exit near the waistline.
Watch that the downstrokes are parallel and that each underturn turns at the baseline instead of sinking below it.
Group 2: overturn and compound letters (n, m, h, v, x, y)
Here the curve moves to the top. An overturn climbs as a hairline, arches at the waistline and comes down thick. A compound curve is an overturn that flows straight into an underturn.
- n: downstroke, then a compound curve.
- m: downstroke, an overturn, then a compound curve.
- h: a tall stem or ascending loop, then a compound curve.
- v: one compound curve with a small high exit.
- x: a compound curve crossed by a straight hairline.
- y: a compound curve followed by a descending loop.
Watch the arches. They should branch from low on the stem, have the same width, and be rounded at the top instead of pointed. Uneven arches in m are the most common thing to fix in this group.
Group 3: oval letters (a, c, d, e, g, o, q)
This family depends on one shape. If your ovals are still uneven, spend a session on the oval stroke first, because seven letters inherit whatever it does.
- o: an oval with a small high exit.
- a: an oval, then an underturn that touches its right side.
- d: an oval, then a tall underturn.
- g and q: an oval, then a descending stroke; g loops to the left and q ends straight or turns right.
- c: an open oval that stops short and ends with a small exit.
- e: a small hairline loop that swings into an open oval.
Watch that the oval leans on the slant line and that the second stroke just touches it. A gap makes the letter fall apart; an overlap makes a dark blot on the right side.
Group 4: loop letters (b, f, h, k, l, j, g, y)
Loops add height and depth. An ascending loop rises as a hairline to the ascender line, turns left and comes down as a long thick stroke. A descending loop does the reverse below the baseline. You have already met h, g and y; here the focus is the loop itself.
- l: an ascending loop ending in an underturn.
- b: an ascending loop, an underturn, and a small high exit.
- k: an ascending loop, then a small bowl and leg added to the right.
- f: an ascending loop that continues below the baseline, closed with a hairline.
- j: an entrance stroke, a descending loop, and a dot.
Watch that the long downstroke stays on the slant and keeps even pressure, and that loops are narrow and similar in size. Wide loops crowd the line above and below.
Group 5: the odd ones (r, s, z)
Three letters do not sit neatly in any family. Leave them until the others feel familiar.
- r: an entrance stroke that rises a little above the waistline, a tiny shoulder, then an underturn.
- s: an entrance stroke to the waistline, then a thick curve that swells to the right and tucks back to meet the hairline.
- z: an overturn that stops at the baseline, followed by a descending loop.
Watch the size. These letters tend to grow or shrink next to their neighbors, so write each one between an n and a u to check that it matches.
A simple practice order
- Warm up with one line of the stroke that leads the group.
- Write each letter of the group five or six times, lifting between strokes.
- Circle your best version of each letter and note what made it work.
- Finish with a line that alternates two letters from the group, such as i and u.
When all five groups feel familiar, the next skill is learning how to connect letters into words. Capitals can wait until then; when you are ready, the guide to uppercase letters follows the same group-by-shape approach.
Frequently asked questions
Which lowercase letters should a beginner learn first?
Start with the underturn letters i, u, t and w. They use the simplest stroke, repeat the same downward and upward movement, and quickly show whether your downstrokes are parallel. Once they look even, move on to the overturn letters such as n and m.
Do you lift the pen between strokes in calligraphy?
Yes. Most lowercase letters are made from two or three separate strokes with a short lift between them. The pause lets you reset the pressure and place the tip accurately for the next stroke, which keeps the thick and thin parts clean.
How long should I practice one letter group?
There is no fixed length. Many beginners stay with a group for several short sessions until the shared stroke looks consistent across all of its letters. Moving on is a matter of comfort, and you can return to any group whenever its letters start to drift.